Author: Allison

  • New York Style Cheesecake

    {G} requested a New York style cheesecake for her birthday cake at the end of December and so did the Mr. for his birthday last week. It’s definitely a favorite at our house!

    Over the years I’ve adapted the recipe a little here and a little there. I’ve lowered the cooking temperature and increased the cooking time, added more cream cheese, and discovered a little trick that has helped prevent cracks in the top of my cake while it cools down.

    New York Cheesecake
    adapted from the Ultimate Philly Cheesecake recipe book

    *important*
    You want to bake your cheesecake in a “moist” oven. I’ve never had a steam setting for my oven, so I always place a 13×9 inch casserole baking pan half filled with hot water on the bottom rack of the oven as soon as I turn it on to preheat. Leave the pan of water in the oven until the cheesecake is cooked.
     
    Allow your cream cheese and eggs to come to room temperature before mixing. And don’t over beat your batter!

    Preheat oven to 325º F. Place pan of water on the bottom rack of the oven.

    CRUST
    1 cup graham cracker crumbs
    3 Tbsp sugar
    3 Tbsp melted butter

    FILLING
    5 (8 oz) pkgs Philidelphia Cream Cheese, room temperature
    1 cup sugar
    3 Tbsp flour
    1 Tbsp vanilla
    4 eggs
    1 cup sour cream

    For the crust: Empty one package of graham crackers in a food processor and process until you have fine crumbs. Mix the 1 cup of graham cracker crumbs, sugar and melted butter and press into the bottom and up the sides of a 9″ springform pan lined with a parchment paper circle. Bake for 10 minutes. Remove from the oven and set aside.

    Reduce oven temperature to 300º F.

    Beat cream cheese, sugar, flour, and vanilla at medium speed with an electric mixer until well blended. Add eggs, 1 at a time, mixing at low speed after each addition, just until blended. Fold in sour cream and pour over baked crust.

    Set timer and bake cheesecake for 1 hour 30 minutes. Don’t open the oven door while your cheesecake is baking! Keep checking the cake every 5 to 10 minutes for the next 30 minutes. 

    As soon as the center dot of your cheesecake is about the size of a silver dollar and almost set (the edges will be puffy and might be slightly brown at this point), turn off the oven and immediately invert a metal bowl over your cheesecake IN THE OVEN.

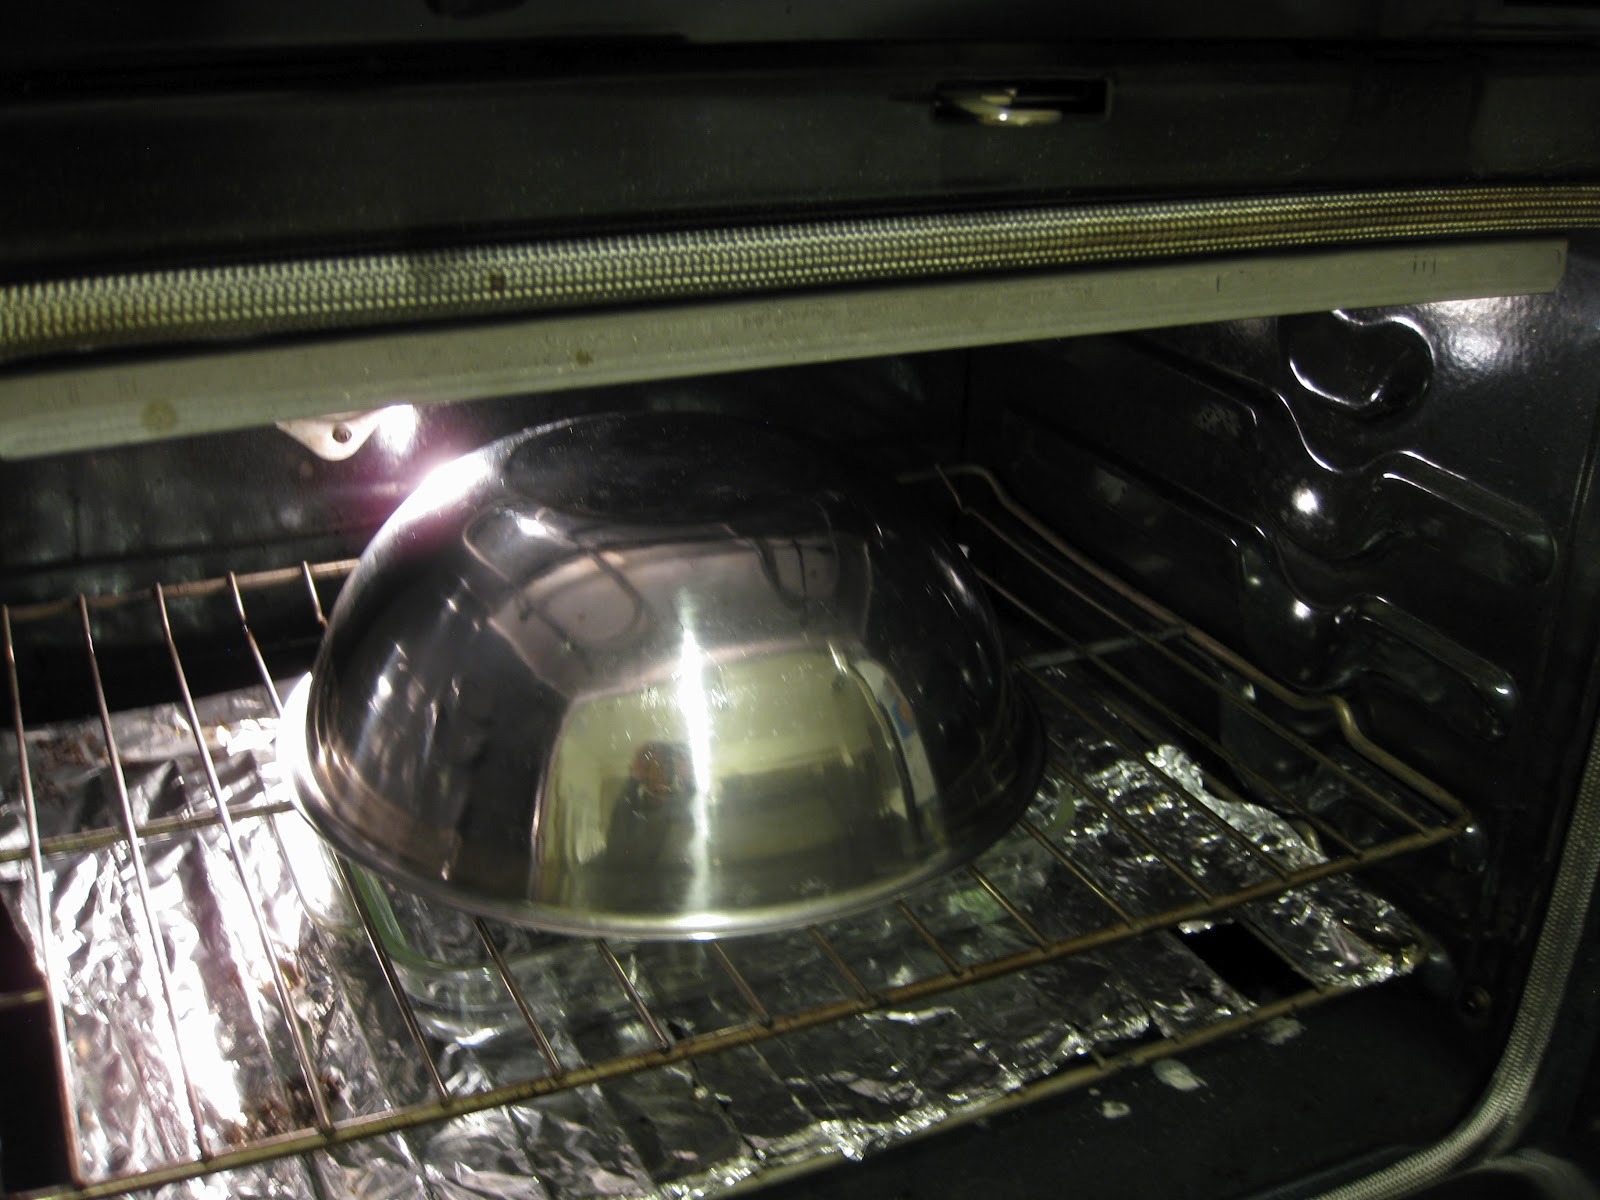
    Then shut the door of the oven and allow the cheesecake to fully cool down and come to room temperature covered by the inverted bowl while remaining in the oven. When the cheesecake is cool, remove from oven  and refrigerate 4 hours or overnight, keeping the cake in the springform pan.

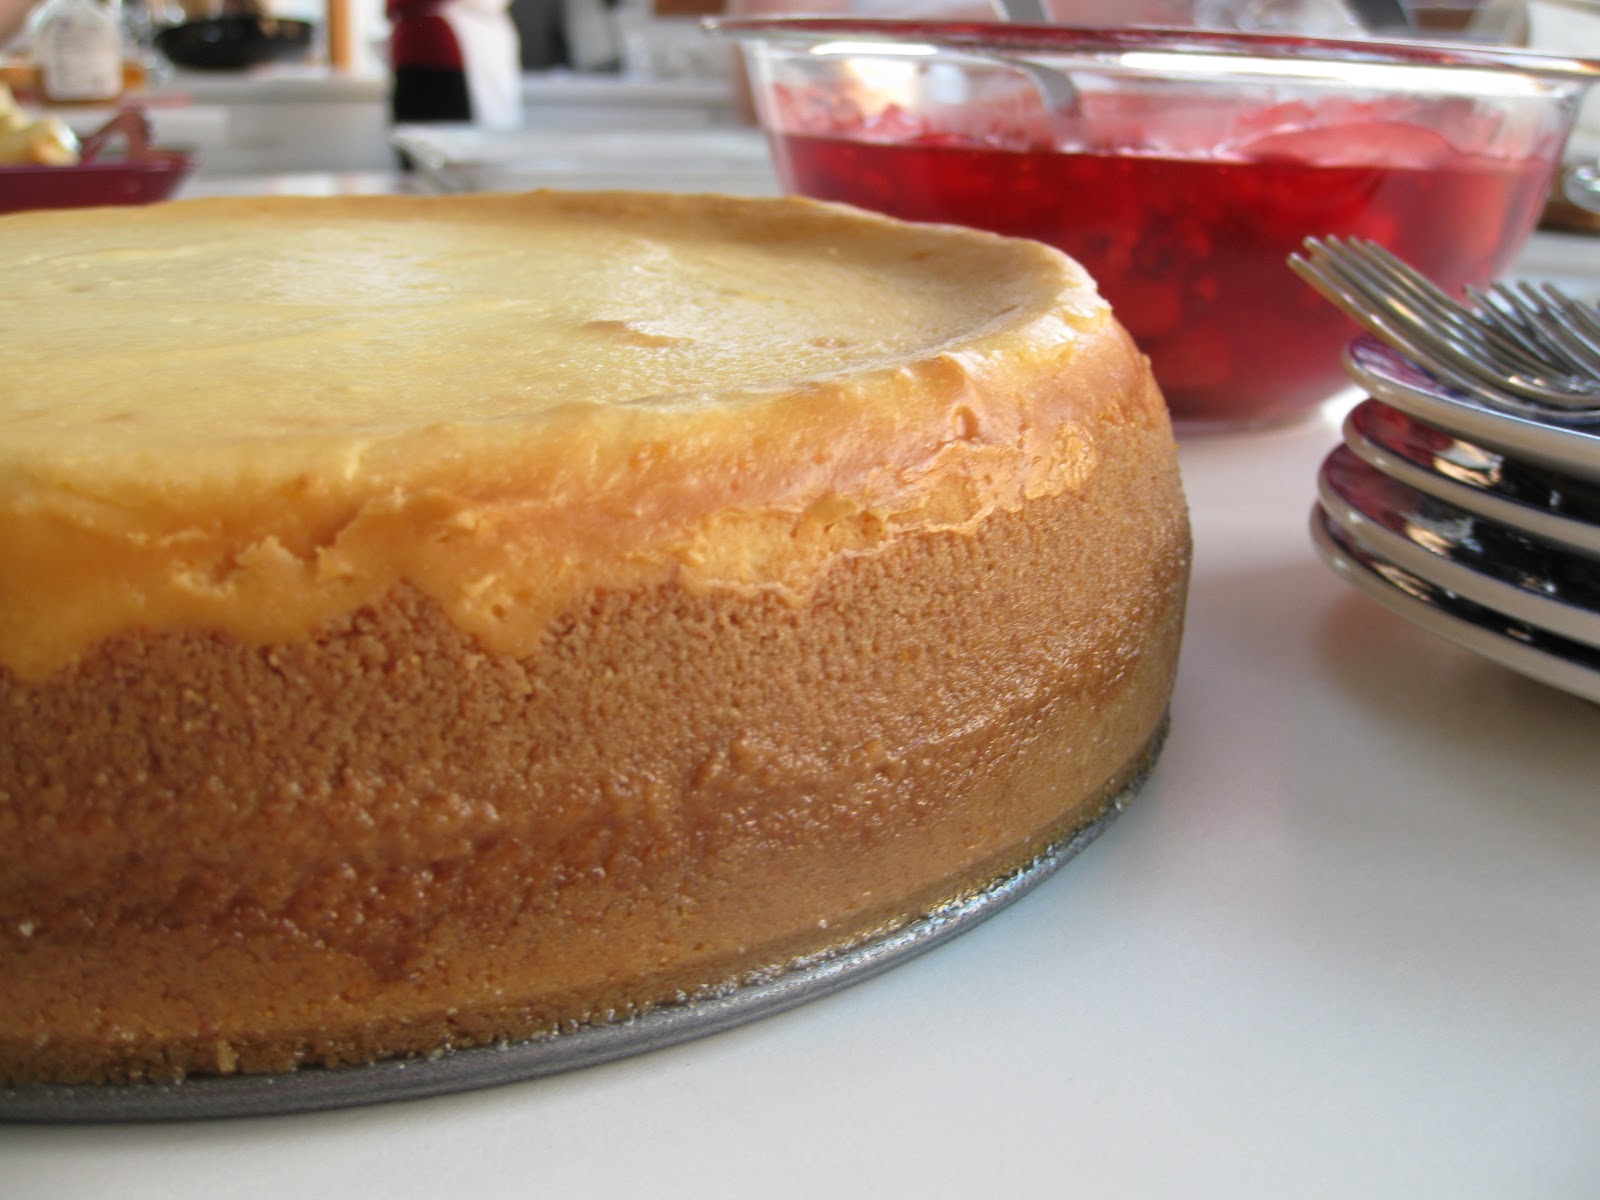
    When you’re ready to eat the cake, carefully run a knife or metal spatula around the rim of the pan to loosen cake and remove the springform sides and serve the cheesecake topped with pie filling or fresh fruit and fruit glaze.

    This recipe also works well in a 10″ springform pan. Your cheesecake will be shorter and will need less time in the oven to bake. Enjoy!

    New York Cheesecake Recipe

  • Dutch Oven Peasant Bread

    For {I}’s Medieval Feast I made 8 loaves of the amazingly simple New York Times No Knead Dutch Oven Bread. I scoured the house for pots with form fitting lids and used both ovens to crank out four loaves at a time between two ovens. It worked like a charm! {I} loves this bread and had been talking it up to his classmates, so the slices of bread went pretty quickly. Crusty exterior with a chewy center, it’s just like European peasant bread. So yummy and unbelievably easy to make!

  • Clan Wallace

     
    Who knew that the difference between the Wallace Crest and the Wallace Coat of Arms could cause so much drama?!? Getting {I}’s projects finished this morning was crazy town around here. I’m sure hoping that his presentations went well today…

  • Free Gingerbread Castle Template

    {I} is in the midst of a Medieval section at school and all the kids had to make a 3-D castle, with 10 labeled parts, and bring it in to school.

    {I} convinced me to help him make his out of gingerbread. He did twist my arm…but only a little bit. We worked on a design, I baked the pieces and we constructed it together with tinted meringue powder royal icing.

    It was surprisingly easy to construct! I forgot to get the exact outer measurements before I took it into the school, but the gingerbread is about a 1/4″ thick, so the basic measurements are 12 1/2″ x 12 1/2″, with the drawbridge sticking out a little bit more.

    We couldn’t resist adding some knights and a dragon.

    We labeled these 10 parts of a castle:
    1. Moat: A ditch around the castle, usually filled with water.
    2. Drawbridge: A bridge that could be raised or lowered. It was usually located over a moat.
    3. Wall: Strongly built and usually not less than 10 feet thick, the wall surrounded the courtyard of the castle.
    4. Portcullis: Main gate of the castle. It was made of heavy wood, reinforced with iron grating and could be raised and lowered.
    5. Murder Holes: Holes in the ceiling just after the front gate. The holes were used for dropping large stones on attackers who got through the front gate.
    6. Parapets: Low walls around the top edge of a tower or castle wall.
    7. Machicolations: The reason why parapets were built. They were holes in the parapets used for dropping all kinds of things, such as boiling oil, hot water, stones, etc.
    8. Arrow-loops: Narrow openings in the castle towers through which archers fired their arrows on the enemy below.
    9. Outer Bailey: The first courtyard inside the outer walls of the castle.
    10. Keep: The strongest and most heavily fortified part of the castle, as it was designed as the last line of defense. The Keep usually housed the owner of the castle, his family, and the Great Hall. The Great Hall was a room at the heart of the castle used for family dinners, banquets, games, dancing, entertainment, and sometimes also contained a courtroom.

    If you want to make your own gingerbread castle use 4x the recipe used for my Gingerbread Houses and this Gingerbread Castle Template.

    When {I}’s Medieval section is done at school, he is planning on devouring the castle with his friends! Yummy!

    Gingerbread House Recipe

    Gingerbread Medieval Castle Template


  • Mouse in the House

    This wee mouse in a tin pattern from Larissa Holland at mmmcrafts is so much cuter than the REAL MOUSE that is pooping in my pantry and gnawing open bags of barley. No joke. The thorough cleaning that I’ve been procrastinating since the beginning of the new year is in full swing now. I’m sorry little grey field mouse that is running across my floor and giving me the heebie jeebies, but you can’t live with us! You must go!

    THIS little mouse could live with us forever, though! 

    When I’m done being grossed out by the real mouse in my house, I think I’ll make a little fabric mouse like this one so that I can tuck it away in it’s tin when I’m done playing with it.

    All images Larissa Holland for mmmcrafts.blogspot.com.

  • Zigzag Chevron Blanket

    I’ve been kind of naughty this week. I’ve been watching hours and hours of Downton Abbey episodes from Season 1 AND Season 2 trying to catch up before the Season 2 Finale on Sunday. It’s been so glorious!

    To make myself feel better about the time commitment of such an undertaking, I’ve been working on the unfinished afghan I gave to my parents for Christmas.

    Yes. I gave my parents an unfinished blanket for Christmas this year. Pretty lame, I know. Check out my Ravelry project page for more information about the pattern and how I adjusted it for the blanket. I’m really loving the pattern! When it’s finished I’ll post more pictures.

  • Sure Love Ya!

    My Grandmother Mangum‘s favorite endearment was “Sure love ya!”
    Wishing you a Happy Valentine’s Day with lots of love!
    Knit heart with banner adapted from this free pattern.
  • Aargh Matey! – Toy Tuesday

    A friend’s sweet little boy turned four last month and I made a pirate doll for him.

    It was so fun to make!

  • Pixie Cable Hat Pattern

    Did you know that I’ve finally finished my knit Pixie Cable Hat pattern?! I’m so excited to finally have it available for PDF download in my Etsy or Ravelry dowload shop! It’s a very vintage-y feeling hat to keep a little one’s ears warm. Don’t let the cables fool you! It’s very easy to knit!

  • Vote for Angie!

    Blond Designs Blog

    My very talented and put together friend Angie {of Blond Designs and Blond Designs Blog} has a DARLING Valentine craft currently in the running for the best bloggers kid-friendly Valentine’s Day craft project on Martha Stewart’s Living in the Family Room blog!

    Blond Designs Blog

    Can you believe how lovely and personalized this craft is? A really nice way for your child to spend a few minutes thinking about the recipient of their Valentine wishes. Check out Angie’s blog for detailed instructions and a free printable download, then HURRY and head over to Living in the Family Room blog at MarthaStewart.com to vote!!

    Don’t wait! Go vote!